Here are some organizations to think about when you are decluttering your home. Giving your items to others that need them, may make it easier.
Clothes:
www.dressforsuccess.org
Electronics:
www.cristina.org
Eyeglasses:
www.lionsclubs.org
Kids Gear:
www.kidsponge.com
Media:
www.thecdexchange.com
Shoes:
www.nikereuseashoe.com
Misc:
www.earth911.com
www.freecycle.org
Thursday, May 13, 2010
Tuesday, May 11, 2010
Summer Zone Yard Work
Thanks to one of my online friends Cheryl, I just made up a daily zone list for my summer yard work. She uses a fabulous zone list for her property, so I've rearranged the days to fit our schedule and here is the outcome. I'm rather excited to get started and not leave the work to pile up on the weekends. The real benefit is stepping outside each day to enjoy the outdoors, even if it's only for 5 minutes. Taking pride in your property and your surroundings does wonders for the soul.
Summer Zone Yard Work
Monday: Trash and junk patrol (carry a trash can or bag around, gather all trash, then keep that handy because more may turn up in the next step)...if you have dogs, now is the time to scoop that up, and if there are rocks on the lawn, scoop those up while you're at it or toss them by hand.
Tuesday: Mow, wack, prune, weed (if it's growing and needs trimming, do that)
Wednesday: Pick up and put away (pick up for mowing if you'll need to do that, straighten patio chairs, plant pots, etc...remove all the stuff that doesn't belong in this area, put it where it does belong, then whatever is left, tidy it up and make sure it's in its proper place).
Thursday: Clean and tidy (wipe chairs if needed, wash windows on the outside of the house that are in that yard, shake off doormats...just really quickly spend a few minutes making it presentable)
Friday: Repairs/projects/maintenance (if there's time left for it, if not, no worries, but if you have time, just pick 2 or 3 small projects or repairs that have been waiting, and do those: fix that sticking gate latch, repot that plant, put a nail in that loose board on the deck...things like that)
Monday, May 10, 2010
Hello, Hello, Hello!!
Sorry for the delay everyone. I was sick for most of the week, so brainstorming, blogging and organizing were put on hold for a bit. I'm ready to move on to a new work zone this week, but in the mean time check out this car organizer. I ran across the article in the Sunday paper and think it's a great item.

http://www.organizeit.com/poswingawayxl.asp

http://www.organizeit.com/poswingawayxl.asp
Wednesday, April 28, 2010
Going Old School.....Storage Solutions for Board Games...Yes Board Games!
I was doing some more research on gaming system storage and came across this great video on storing "old fashion" board games. Doesn't everybody have a Monopoly or Life game that is falling out of the box. These storage boxes are great!
You can pick them up online at Amazon
or at OrganizeIt for about $12.00.
Here's are some other suggestions from About.Com. With a little care and effort, your board games can last forever in their original packaging.
___________________________________________________________________________________
Storing your board games and card games properly is important in order to ensure that they don't sustain any unnecessary damage. These tips should help your games last for many years to come.
Here's How:
- If at all possible, store your games vertically. (Enclose the pieces in zipper-style baggies to avoid spilling.)
- Stacking games oriented horizontally might cause the ones on bottom to be crushed.
- If you must stack your games, alternate them so that they are cross-stacked and the sides of the games are absorbing the pressure. (Do not put a smaller game on top of a larger game, as this will cause the box top of the larger game to sink over time.
- If even cross-stacking is not an option, place smaller games at the bottom of the pile. This reduces the amount of potential damage to box covers. Keep your piles relatively small.
- When possible, store smaller games -- like card games -- in drawers.
- Place a sheet of acid-free paper or plain cardboard between especially valuable games.
- Do not use rubber bands because they will disintegrate over time and can cause damage to the box edges. If necessary, tie a piece of soft yarn around the game box.
- Position your games so that direct sunlight doesn't hit them, since sunlight will cause the colors on the cover to fade.
- Store your more valuable games in an enclosed shelving unit so that they can be kept as dust-free as possible.
- Store your games in a room with controlled humidity.
- Place a sheet of used fabric softener inside the box to give older games a fresh smell.
Tips:
- Inexpensive metal shelves purchased at a home improvement can be a good low-cost storage option for board games.
- If you have the ability, consider buying or building a custom wood storage cabinet for your games. Home improvement stores also sell enclosed plastic shelves (designed for laundry room use) which can provide some extra protection for your most important games.
- Watch the temperature and humidity in the room where you keep your games. Old games in particular can be susceptible to mold.
Sunday, April 25, 2010
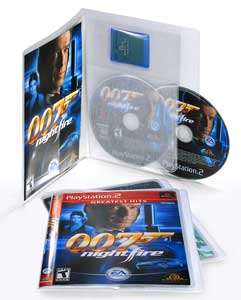
Organizing that Gaming Mess
I'm getting ready to tackle my family room this morning and although gaming systems aren't a problem in our house, they are for many. For the few games we have I use the wonderful plastic shoe totes I talked about in the last post. If you have a lot of accessories and games to store, here are some organizing tips from Studio 5 news in Salt Lake City and I found some great links to these suggestions.
Create a Gaming Zone
Your gaming zone should house all your gaming items and will likely be by the monitor or TV where you actually play your games. There are a few possible exceptions to this zoning rule: (1) games that are used specifically for rewards, (2) games that are otherwise parent-regulated, and (3) instruction and playing manuals.
Contain
In order to keep your gaming zone relatively tidy, use some kind of containing. Many entertainment centers and armoires now come equipped with handy gaming storage features. But you don't necessarily need a piece of furniture to successfully contain your gaming equipment. Even if your gaming system didn't come with a storage case, you can find some economical and effective video game containing at your local big box retailer. Consider the following options:


Establish Your System
Containing only goes so far in helping you keep your gaming equipment organized. You also need a system. Most gamer moms agree that the biggest challenge in keeping gaming items organized is making sure games get replaced in the correct cases—or at all. A simple system is all it takes to ensure that game time is more fun than frustrating. Try these top three tips:
I also found this fun piece at sears. I think it's great for a kid who has their system in their room. It holds a TV, the gaming system, some games and and the guitars.

The possibilities are endless. As with any system, it can be as simple or complex as you like. Spend some time searching "Gaming Storage" online and you'll be surprises at all the great products available. My favorite product of this search are these sleeves that can save a ton of space. I've been considering them for our DVD collection, but they also have a set up for video games. You can check out this product here DiscSox

Create a Gaming Zone
Your gaming zone should house all your gaming items and will likely be by the monitor or TV where you actually play your games. There are a few possible exceptions to this zoning rule: (1) games that are used specifically for rewards, (2) games that are otherwise parent-regulated, and (3) instruction and playing manuals.
Contain
In order to keep your gaming zone relatively tidy, use some kind of containing. Many entertainment centers and armoires now come equipped with handy gaming storage features. But you don't necessarily need a piece of furniture to successfully contain your gaming equipment. Even if your gaming system didn't come with a storage case, you can find some economical and effective video game containing at your local big box retailer. Consider the following options:
• Controllers—Cords tend to be the biggest clutter culprit with controllers. To keep stray cords under wraps, you can use either a cable turtle (a sturdy, spindle-type container; or Velcro cord wraps, available at do-it-yourself centers like Lowe's and Home Depot. (A caveat: the cable turtle is easier for little gamers to use, so unless you want to do cord control by yourself, choose this option.) Cable Turtle

• Game cartridges and discs—Game cartridges and discs are the biggest gaming organizing challenge for a few reasons: they're small, they're easy (and expensive) to lose, and they are easily destroyed. To tackle this greatest organizing challenge, here are some of my favorite product picks:
• Game chamber video game storage organizer. If you have DS or DS Lite cartridges that are constantly AWOL, this organizer is your saving grace. This organizer is the ONLY locking organizer, which means that your child has to replace one cartridge in order to take out another. (Can you hear the angels sing?) At $19.95, this organizer (available in blue, pink and silver) is worth its weight in gold. The Game Chamber

Gaming Ottoman
• 3-ring binder with page protectors and alphabetized tabs. This low-cost, low-frills option will help you contain your cartridges and/or discs alphabetically. If you choose to store your discs using this method, you may wish to place them in paper disc covers so they don't scratch. You can also create an inventory of the games that should be in each envelope so you know what is, or isn't missing. You can also modify this storage option by using plastic CD storage pages.
• White plastic baskets from Walmart. This 3 baskets for $1 option is perfect for containing cartridges and discs. The pencil size basket is great for cartridges and the large size works well for discs. You can create homemade alphabet tabs so your games stay alphabetized as well. (These types of baskets are also available in black at Office Max.)
• CD/DVD boxes. This inexpensive and functional container is perfect if you have your original disc cases. Alphabetizing your games lends an even greater level of organization.
• Gaming consoles and ottomans— If you're looking for a more permanent gaming console, many furniture stores now carry entertainment systems and armoires with gaming accessible features. One of my favorite gaming furniture pieces of the season is an ottoman available at Costco for $89.99. This stylish, espresso-colored faux leather trunk holds—
• 2 guitars, microphone and drumsticks plus Rock Band or Guitar Hero drums, an Xbox wheel with pedals or a Wii Fit balance board. • 4 box controllers or up to 8 Wii remotes and 4 Nunchucks (in a drop-in plastic utility tray)
• 16 games (in a sliding plastic utility tray).

Establish Your System
Containing only goes so far in helping you keep your gaming equipment organized. You also need a system. Most gamer moms agree that the biggest challenge in keeping gaming items organized is making sure games get replaced in the correct cases—or at all. A simple system is all it takes to ensure that game time is more fun than frustrating. Try these top three tips:
• Establish and enforce a one-game-out-at-a-time policy.
• Create a check-out system for kids particularly prone to losing discs and cartridges.
• Create a gaming clean-up time (either after each gaming session, every couple of days, once each week) to make sure that nothing is lost and that your equipment is in good condition.
I also found this fun piece at sears. I think it's great for a kid who has their system in their room. It holds a TV, the gaming system, some games and and the guitars.

The possibilities are endless. As with any system, it can be as simple or complex as you like. Spend some time searching "Gaming Storage" online and you'll be surprises at all the great products available. My favorite product of this search are these sleeves that can save a ton of space. I've been considering them for our DVD collection, but they also have a set up for video games. You can check out this product here DiscSox
Tuesday, April 20, 2010
Plastic Shoe Bins and Totes are a Mom's Best Friend
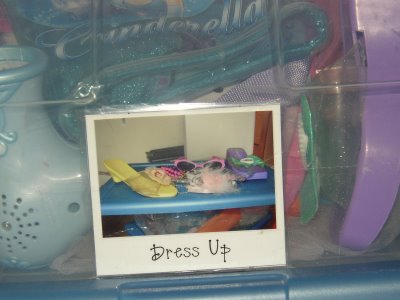
When reading Woman's Day this morning, it had a small paragraph about "Bin It". When my daughter was younger, using bins to organize everything in her play area was key. Not only to keep things organized and grouped together for my benefit, but those totes helped her find what she wanted easily and helped her put things away quickly.


Plastic shoe totes can vary greatly in price and shape. You can find them for .99 cents at the Dollar Tree or Big Lots or you can pay as much as $4.00 if you want a higher quality tote. I would suggest when you find a product and price you like, you purchase a large quantity. Even if you don't use them all now, having them the same size and brand will help with stacking and storage. We all know toys vary in size, so consider picking up some medium size totes while your at it.
Once you have your totes, you can make this as simple or detailed as you like. Some suggest labeling your totes, other suggest photos or pics of items in the tote. Thinking back, I never did label my totes. If my daughter took something out, it was put back in when she was done. They were clear, so it made it easy to tell what was inside.


Over at the Ducks In A Row , Laurel has some great examples.
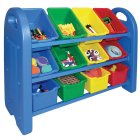
If you are looking for something all inclusive, there are plenty of toy box options available in your local stores or online. I TOY BOX
has some great pieces if you have a higher budget.


Now, that we've covered the little ones, I'd like to say that storage bins aren't just for the little ones. Big Girls can use them for their "toys" as well. I'll share this great photo with you and save the details for another day!

Sunday, April 18, 2010
Let's get started on the Family Room!
My next zone area is the family room. If you don't have a secondary family room, the same checklist applies for the living room. My family room is our main TV viewing area and where all of our DVD's and gaming systems are kept. It's usually last on my cleaning list, becuase it's in the basement and not my primary "entertaining" area. That means, when this area comes up on my zone list I always have to do alot of dusting and deep cleaning because dust is ruthless and always seems to accumulate in every nook and cranny.
As usual, my check list is comprised from suggestions from the Holiday Grand Plan and Flylady list. So here are those checklist and I'll be back with my detailed list tomorrow.
Holiday Grand Plan: Family Room
Start by washing the outside of your windows.
Take everything down off the walls, take down curtains etc. Wash, vacuum or dry clean as needed.
Sweep ceiling corners and other nooks in the room - tops of doorways, windows, arches, bookcases, etc.
Wash inside of windows and sills. Polish and touch-up stain on wood.
Re-hang window coverings.
Take cushions off furniture, vacuum thoroughly. Vacuum cushions, checking for wear and turning as needed. Spot treat any stains or shampoo furniture as needed.
Wooden furniture and anything with drawers: Empty, sort, and throw away what you don't really need. Put the rest where it really belongs. Dust/Polish the piece you're finished with, repeat as necessary. Do shelves the same way.
Baseboards - dust or wash as needed touch up scuffs on wood or touch up paint on painted surfaces.
Clean the TV screen. Dig out and sort all the accumulated electronic equipment--games, tapes, camera parts, wires, connectors, etc. Put everything where it belongs and get rid of the rest. (I stash things for a few months in the attic and if they don't miss it then I can dispose of it as I please!) If something doesn't work, take action--if it is worth getting fixed then decide when it can be done. Otherwise just liquidate it now.
Vacuum the entire room. Use a whisk broom to get into those hard to reach areas and around the baseboards if your vacuum doesn't clean close enough. Yes, get help and move the furniture. There may be a wealth of lost treasures hiding under the sofa right now!
Clean/change silk flower arrangements for the season. It is also a good time to clean, trim, and/or repot live plants. They can't absorb CO2 and light through a layer of dust!
Other items needing attention if you have them are:
Fireplace/mantel/chimney/glass doors
Lamps - cleaning and/or replacing shade/bulb/wiring
Light switches (clean)
Mirrors and anything framed under glass clean it.
Door handles--and the area around them-- if you have little sticky fingers be sure to get the area below them clean too with an appropriate cleaner. Polish the wooden doors and retouch scuffs.
Clean shake/wash/vacuum/take to professional-- any area rugs.
Now is a good time to reorganize the video tapes and CDs, Cassettes etc. If you have not viewed or listened to them in a while, donate or take to a consignment shop or a second hand music store and swap.
Don't forget the gaming systems. Does everything have a home?
___________________________________________________________________
Flylady: ZONE 5: LIVING ROOM/ FAMILY ROOM/ DEN
1. CLEAN COBWEBS
2. CLEAN WINDOWS
3. STRAIGHTEN BOOKCASES
4. WASH ORNAMENTS AND WHAT-KNOTS
5. CLEAN OUT END TABLE
6. STRAIGHTEN CLOSETS/ DRAWERS
7. WIPE FINGERPRINTS FROM WALLS
8. POLISH FURNITURE
9. CLEAN OUT MAGAZINE RACKS
10. CLEAN PHONE
11. CLEAN UNDER CUSHIONS
12. CLEAN OUT FIREPLACE
13. MOVE FURNITURE AND VACUUM
14. SHAMPOO CARPET
If you have a family room, game room, sun porch, or other room that is
used by the family for living purposes, then concentrate on decluttering
one room each month (or as you find more time). Do not push yourself.
They did not get cluttered in one month and they will not get clean in one
week. Remember: baby steps. If you are unable to do any task, just delete
it and go to the next one. Do not save them up. We will repeat the same
thing each week and each month. I am just your reminder. - FlyLady
Thursday, April 15, 2010
Preparing for NEXT years taxes!
In honor of tax day, here is a great article to
get you prepared for next year.

It's never to early to start.
*********************************************************************************1) Pretend You’re a Fortune 500 Company
Large publicly traded companies are required by the SEC to file financial reports on a quarterly basis (form 10-Q) to keep the stakeholders (which consist of the shareholders, the public, the government, and others) informed about their performance. Similarly, you should divide your year into quarters, or if it’s easier to keep track of, seasons:- Summer – In the summer, you should start organizing your records. As of a few months ago, you actually filed your taxes. And what a relief that was. However, taxes never stop. You should make sure your filing system is intact and ready to go with the new year’s tax records, starting back in January. Make sure that the past 6 months look good and that you are ready to go for the rest of the year.
- Fall – Begin estimating your end of year annual income and taxable income. You should have a pretty good idea of your salary, hourly wages, commissions, bonuses, etc. This obviously won’t be exact, but you should have an approximate. This will let you know if you are behind or ahead on tax payments.
- Winter – The year is practically over (or is over depending on what part of winter it is!). Start preparing to file your taxes. Get all of your documents ready to go. Start gathering the different tax forms you will need. Separate receipts you will need from ones you won’t need.
- Spring – Actually file your taxes, now. If you have kept up to date over the past 3 seasons, you should be able to file relatively quickly! But, it’s not over. Continue on to “summer” and do it again!
2) Practice Good Record Keeping
Obviously the over-riding theme behind the last section was keeping good records, staying up to date with them, and just being on top of your game. On top of keeping good records, you want to practice good (and safe) record keeping by keeping some of your documents extra secure.Think about it this way: If you lose a pay stub, you can get a new one printed out through your HR or payroll department. If you lose a receipt for a large ticket item, you can probably get the store to re-print it. If not, the consequences aren’t too severe.
What kinds of documents should you keep extra secure?
- Birth certificates for you and your family members
- Any wills that have been drafted or published for you (and your spouse)
- Stock and/or bond certificates for large holdings
- Deeds to any real estate holdings
3) Adjust Your Withholding on Your W-4
As discussed in the linked article, you usually want to adjust your w-4 to maximize your earnings, which in tail minimizes your refund or payment. The closer you can get to $0 owed the better.There are a few thought processes:
- A tax refund is an easy way to save. It is, in a way, a forced savings plan. You probably wouldn’t have the willpower to save the money otherwise, so getting it all in one lump sum may help you apply it towards debt or towards a goal.
- A tax refund means you threw money away. Had you received the money you would have put it in an investment vehicle that pays interest. You gave the government a tax-free loan.
Also, unless you are getting a large amount of interest, the amount of money you are missing out on is probably pretty minimal. The average tax refund is about $2,500 and at 3% for the year, you would earn less than $100. In the end, do what’s right for you.
4) Keep Your Receipts
The linked article will give you a lot more depth. But the jist of the article is that you should keep all important tax records filed for up to 7 years (different times for different kinds of documents).An overview of a few of the forms you need to keep on file:
- Paycheck stubs
- W-2 Forms/1099 Forms
- Receipts for any items you can deduct if you plan to itemize
- Insurance and medical records
- Charitable records
5) Pay Your Taxes Before You File
You are required to pay your taxes. If you don’t believe me, click on the above link and see the awesome picture of Wesley Snipes.Sometimes people don’t realize that there are rules around how you can pay your taxes, though. You must pay them throughout the year. You cannot pay them in one lump sum at the end of the year. So, if you were to decide to keep the money all year long (thus giving yourself an interest free loan) you would get in trouble even if you pay your full tax bill at the end of the year. The IRS will charge you a penalty for not making estimated payments.
You are unlikely to have made enough money off of the interest free loan to cover the penalty, so this is a losing proposition.
As said earlier, adjust your withholdings accordingly and make sure you pay your tax rates all throughout the year.
Do It All Over Again
There you have it, 5 simple ways to make tax season a breeze every year. If you follow these steps you should find you are spending less time every Winter/Spring filing your taxes.As I said earlier, it does take a little bit of time up front, but the time you save in the back end makes it worth it!
If you have any suggestions for any of the 5 steps, or an additional step you would like to add, please leave it in the comments!
My Life ROL Article Link
Wednesday, April 14, 2010
The BIG Bad Blog World!
I'm so excited after attending a seminar class on blogging tonight. I'm ready to expand and make this blog accessible to all kind of readers dealing with clutter. More importantly, I'm looking forward to making Clutter University actually happen. I've got all kind of great ideas for post, so stay tuned!
Thursday, April 8, 2010
Final Reveal and Decorating Tips!
My daughter came home tonight to see her room all in order and was very excited. She quickly realized how much work I'd put into it and was very thankful. That was very nice and made it worthwhile.
When I originally decorated her room, we decided to go with a "Beach Cabana" theme. So that's why we chose such bright colors. At that time, Target just happened to have a complete line of linens on the clearance rack, that would work perfectly. When I have a project in mind and products I want to buy, it really pays off to keep an eye on the markdowns...especially at Target. Once I had a plan in mind, I bought items available and totally adapted them to my needs.
So here is the big reveal!
First is her bed and headboard. The headboard itself was free. I looked on freecycle and found a college student in Boulder who wanted to get rid of his bed.The center board comes out and originally had an ugly piece of maroon felt on it. I removed the board and covered it with material from a table cloth. The palm tree came from my friends tanning salon. When they bought the salon, it was stuck in the back room and knew I had to have it!

This great picture on the wall was an Ebay buy. I did a search on ebay and found an artist who was selling her prints and I thought this one was perfect. Hip and tropical! I then found a frame that had a bamboo feel and together it made a great focal point in the room.


Although there is nothing creative about her dresser and hutch, it is the collecting spot for her various collections. Marie's, fairies, waterglobes, barbies, and little nic-nak items from all over the country.

Originally her corner window had a sheer curtain, but it quickly rotted from the sun, so when I was in search of a replacement I found this one on clearance. Only problem was, it was a full length curtain. I bought it anyways, thinking I would cut it down to size. After I got it home, I didn't even have to cut it, because once it was folded in half, it was the exact length I needed. I just pinned it at the top and left it that way. For this window I used a single bamboo stick as her curtain rod.

Next is her closet. The doors never did fit right and dragged really bad on the carpet. So when we moved her into this room, I decided to take the doors off all together and use a curtain instead.

This set up is a modge podge of items. First the big portion of the curtain was actually I shower curtain. To make it the right length, I added decorated hand towels on the bottom. The flowers on the hand towels are the same flowers on her duvet cover.

The top valance is actually napkins that I sewed together to fit the full length of the curtain rod. We used a double curtain rod to hang both, but because the shower curtain didn't have traditional loops like a curtain, I added one of those plastic shower rod covers to the curtain rod and that allowed us to use basic shower curtain hooks to attached the curtain itself.

The next area I decorated was above her door. Now these were fun items that I knew I wanted, but I didn't know what I'd do with them. After some brainstorming I finally figured it out. The pineapples are actually pot holders. The center piece is a bamboo charger that I flipped over and attached the plastic plate too.

Her book case is next and it's used to store books, clocks, dolls and I- pod charging. Both her night stand and TV stand were purchased at Big Lots. They also have that bamboo, tropical feel to them.

Then comes her new "vanity" area. It's not really anything fancy, but she asked to have a stool so she could use her full length mirror without having to hold it in place. I mounted her mirror, found this stool at target and added the little blue table in the corner so she would have someplace to keep her makeup and curling irons. The new light I bought for her room, had an extra lamp off to the side and that is perfect to add lighting to her face while getting ready.

If you can believe it, I found this guy at a garage sale. Who would of thought?

Her chester drawers have this great mirror above that I found on craigslist. If I remember correctly, I did an swap for something to get it. I was going to toss the green lamp, because the top portion is broke, but I just detached it and left the side lamp to giver her even more light. You can also see the new headband holders I made off to the right.

Above her drawers is a window that's really not reachable unless I use a ladder. I didn't need to cover it entirely, because you can't see anything but the ceiling from outside, but I did want to block some of the light. The curtain panels are very large kitchen towels. The pinapples on the towels, matched the potholders I used above her door. The valence are napkins that I sewed together. These napkins also match the table cloth I used on her headboard. The pineapple on the window seal I also found at a garage sale. It was a horrible brown, but I lightly painted it with white. Most of these ideas are my own, but I do have some help from my BFF. When we get together, our creative juices get flowing and the outcome can be priceless.

Last, but not least is the ceiling. I found these paper lanterns and knew I wanted to hang them from the ceiling. They serve no purpose, other then looking cool. However, they definitely are a topic of discussion when someone new comes to our house and from outside, sees these great big balls hanging from her ceiling. Lots of people, also mistake that pineapple in her window, for a head when they are outside. Pretty funny!

I know this current post isn't exactly about organizing in the traditional fashion, however it is about organizing your creative thoughts. With a little effort, anything can become something! Just step back and evaluate what you have and what it may become.
Wednesday, April 7, 2010
Purse Rack and Hair Accessories
After a trip to Target yesterday to finalize a few purchases, Ms. Ciara's room is finally clean and in order. I still have some minor repairs around one baseboard section, but other then that it's as clean and organized as it's going to get this go around. Sad thing is, she hasn't been home for 2 days to see it. So tomorrow, when she gets home, she's going to be one happy camper. It's been one long day, but I wanted to hop on here and show you a few more organization ideas I've used in her room. Tomorrow, I'll work on the big reveal and also show you a few decorating ideas I used in her room.
In the mean time, I'd like to show you her purse rack. We started with an over the door coat hanger, but found that the purses were to bulky to open the door all the way. Now she uses that for coats, as intended.

When I was in Utah last year, we made a trip to Ikea. When walking through the closet section, I seen these retractable tie racks and new immediately they were exactly what I was looking for. They are intended for an interior closet, but she doesn't have a walk in closet, so we mounted them to the wall next to her dresser. They do need to be stacked by size for the best fit, but otherwise it works great and serves it's purpose.


I had mentioned earlier that my daughter asked for something to hang her bows on. After collecting and separating everything she had, I quickly realized hanging them was going to be unrealistic. Instead I used these very cute cubes I purchases on clearance last year at Joannes. I divided everything by type of accessory and 6 of the cubes held everything and fit perfectly into her drawer. I know from personal experience, that putting every hair scrunchy or barrette away, every time you take it off is a bit unrealistic, so I suggested she keep a small box on top of her dresser, toss them in there and then at least once a week, take the time to put them back in the appropriate box. That's what I do in my bedroom. Remember, the key to organization is having a place for everything.

Wednesday, March 31, 2010
Utilizing Hidden Space
I wanted to share some of the items we've put in my daughters room to help utilize what I call lost space.
First is her CD, DVD shelf. When we moved her into this room, I knew immediately I wanted to utilize that small space between the wall and door frame for some shelves. The space fits her CD and DVD's pefectly and has kept us from having to purchase any type of media rack or bookcase.


My daughters room, as well as my dining room were previously the garage space. After a fire in the upper floor of our home, the previous owners turned the space into additional living area. When they put the closet in the bedroom, they couldn't extend it because of the window. This meant I had a huge space between the closet and window that could not be used for much of anything. I debated putting multiple shelves in, but decided it was to deep and things would just get pushed back and lost in space! So I opted to put in 1 shelf. Nothing fancy. Just a frame around the base and 2 pieces of ply wood to lay across and form a shelf. Underneath we keep a plastic tote for my daughters stuffed animals and above we keep totes for her various activities. Over the years, we've really utilized this space for storing toys, craft supplies and who knows what else!

If your child has a busy schedule like mine, I highly suggest you dedicate a tote for each activity. When it's time to go, they can just grab it and go. Here are a few of the totes we have set aside. Girls Scouts, Art Supply Bag, Youth Commission, Youth Church Group, Babysitting Kit and an Over Night Bag with her personal care supplies. The overnight bag has helped a lot and keeps us from scrambling when she spends the night at a friends house.

Last, but not least are some basic hooks. I've attached one next to her window, where she keeps her school bag or purse she's currently carrying.

I've attached another to the outside of her closet, where she's suppose to hang her towel to dry each night. I won't lie it doesn't always make it up there. She's what I call a towel hog! 80% of our towels end up in her room, but in the event she decides to use it some day, it's good to go!

Don't hesitate to use any space you may have. Especially in a smaller home. If you have a bathroom big enough to store everyone's towels, then great. If not, there are plenty of over the door and wall hangers available to choose from. Step back and take a look. Do you have a corner or cubby in your room, that could be utilized with some basic shelves? Jump in and be creative!
Tuesday, March 23, 2010
Making a Checklist for Child's Bedroom
I finalized the checklist for my daughter's bedroom over the weekend. To do this, I start with 1 piece of furniture in her room and then sweep through the room, in a large circle, visually in my head. Moving from 1 piece of furniture to the next; evenutally ending where I started. Then I do a top to bottom visual check. That means starting at the ceiling, moving to the walls and moving all the way down to the baseboards and carpet. If doing this without being in the room is an issue for you, then take yourself into the room for a visual check and follow the same steps. To make this even easier in the future, keep that list on your computer and when the same room or "zone area" comes up, you can pull the list and get to work without much thought.
Many organization sites offer list. Using one of those list is a great foundation, but as you can see I have some odd things to do in my daughters room. Personlize your detailed list, however small. Don't hestitate to put it on there. The more you are able to check off, the greater you'll feel.
Ciara’s Bedroom:
[] Closet
[] Jewelry Chest & Plastic Container Underneath
[] DVD & CD shelf
[] Coat Rack
[] Cork Board
[] Book Shelf
[] TV Stand
[] Dust TV
[] Fix Posters
[] Chester Drawers
[] High Window seal
[] Curtains
[] Fix Headboard
[] Dust Palm Tree
[] Fix Ceiling Curtain
[] Change Sheets, Fix Duvet
[] Nightstand
[] Totes Under Bed
[] Clothes Drawers
[] Nick Knack Shelves
[] Clean Maries on Top
[] Dust Lampshades on Ceiling
[] Window Seal
[] Window
[] Corner Shelf
[] Stuff Animal Tote
[] Floorboards
[] Vacuum
[] Clean Carpet
Here is the checklist from Flylady
Children's Bedrooms Detailed Cleaning List
1. POLISH FURNITURE
2. STRAIGHTEN DRAWERS/ CLOSET
3. CLEAN COBWEBS
4. WASH MATTRESS PAD/ DUST RUG
5. FLIP MATTRESSES
6. WASH CURTAINS
7. CLEAN WINDOW
8. STRAIGHTEN TOY SHELVES
9. CLEAN UNDER THE BED
10. CLEAN OUT THE CLOSET
11. PUT AWAY STRAY ITEMS
12. SORT OUT-GROWN CLOTHES
13. VACUUM UNDER BED/ CLOSETS
14. DUST BASEBOARDS
15. CLEAN FINGERPRINTS OFF DOOR/ WALLS
16. REARRANGE VIDEOS/ GAMES/ BOOKS
Last, but not least. Be sure to check out Organized Christmas. I'm a huge fan and they have a great list!
Friday, March 19, 2010
Daughters Closet is Purged....Goodwill here we come!!


I finally decided to work on the closet today. As I said earlier in the week, Miss. Ciara's has already been pulling some of the clothes out, but I didn't realize just how much still needed to be purged. This closet purge is a perfect example of how decluttering is an ongoing process. We really do sit down together, 2x a year, and go through her closet. Sometimes I'll suggest she keep something, other times it's her insisting she keep something. Sometimes we keep things "because they almost fit" and other times we keep them simply for sentimental reasons. But each and every time, we think we're done, 6 months later I find another pile to take out.More times then not, they are things we debated the last go around.

Not only did we have an issue with clothes, but teens seem to have an endless supply of backpacks and bags. We have backpacks that her uncle buys, we have backpacks she's received from Girl Scouts and we have bags from every training conference she's ever been too! I eliminated a few small bags, but most of them I was able to store inside her largest backpack. So now the top shelf of her closet holds, 1 large backpack, her overnight bag and 3 pairs of boots she only wears on occasion. All need to be accessible, but not every day.

Because our home has limited storage, we have no choice but to store her suitcase in her closet. We'd like to keep it elsewhere, but until I find the "perfect" spot, it will be just fine where it's at. However, I know that no space needs to go wasted, so I've stored her old jeans inside for use this summer. These are jeans, she only wears for camping and motorcycle riding, so it's a perfect solution to free up some more closet and hanger space.

Overall, I think I did pretty good with being honest about what she will wear and will not wear again. I think purging when she was little was much easier. Clothes either fit or they didn't fit. Now it's more about what's "IN" and what's "OUT". What she liked 6 months ago, is so different then what she's wearing now.
Lesson for today...Don't hesitate to purge those closets. A few of the clothes will be returned to my closet, some will go to my niece and the rest will be donated to Goodwill for a tax deduction. And the best news of all...this whole process took me 1 hour and 10 minutes.

Tuesday, March 16, 2010
Warning: Cleaning Your Teens Room May be Hazardous to your Health

Let's just start by saying, that I've had my zone list posted on the fridge since January. Not only have I told my teen daughter verbally, that come March, I was going into her room, but it's been posted and visible for everyone to see. Every time she gets a glass of water, it's STARING HER IN THE FACE! Come March 15th, there were no more excuses and no reason to keep me out. I've always included her in the big semi annual clean ups in her room, but for this go around, I've decided I'd give her 1 week to start the process herself. For the last week, she's been purging and organizing drawers and eliminating extra clothes from her closet. I still insist on making the final YES or NO decision, but enforcing the NO's is becoming less of an issue. So far, I've only had to say No when she insisted she toss out 3 pairs of old jeans. As far as I'm concerned, a few pairs of old jeans is absolutely necessary when packing for camping trips and motorcycle rides out at the farm. If it was left up to her, she'd wear her best skinny jeans, a beautiful blouse, a nice pair of high tops and a big bow in her hair. Being the fashion Diva she is, I kindly remind her that being a real fashion Diva means knowing how to dress appropriately for the occasion.
I’ll keep you posted on how it goes with Ms. Ciara, so be sure to check back for some great tips on how to clean and organize your teen’s room.

Saturday, March 13, 2010
Completed My Headband Holder Project!!


The hardest part of the project was deciding just how big to make the center piece. To small and the headbands would turn, to big and the headbands would stretched to far. I finally opted for a partial used roll of paper towels and a double layer of batting. After the fact, I'm really thinking that the batting could be skipped all together. If the roll of paper towels was used, with the fabric alone, I think the size would be almost perfect. It would also reduce the cost even more.
After my crafty work was done, my husband was speedy and hung them up right away. Don't forget to use a leveler!


Once my daughter hung up some of her headbands, I got the ultimate "Wow, mom...I've got to give you kuddos on this one. It's a pretty cool idea!!"
Within 30 minutes, I'd already been assigned a new project. Ms. Ciara has asked for something to clip her bow barrettes on. That should be simple enough!
Subscribe to:
Comments (Atom)
